With this guide we will see how to set a network proxy on Ubuntu. We have already seen how to setup Mozilla Firefox to use a proxy, how to setup Google Chrome to use a proxy, and how to setup any browser to use a SSH proxy, but by setting a network proxy on Ubuntu, all network applications will automatically use it.
First go to “System Settings” and then to “Network” (in the Hardware section). On this windows you have three sections (on the left): the first two are for setting a network connection (as the names imply, the first is for wired connections and the second for wireless connection) while the third, “Network Proxy”, is the one we need.
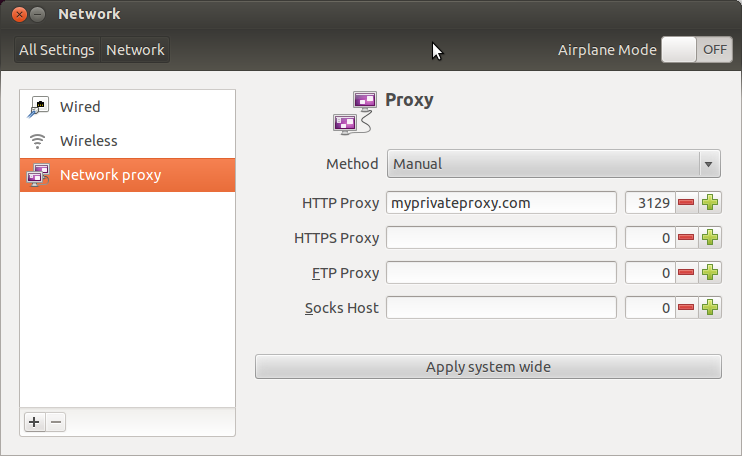
On the drop-down menu (by default set to None) select the “Manual” option and then on the appropriate line (you don’t need to fill all four unless you need it and you have the appropriate information) indicate the server address of the proxy and the port it uses.
Once you have written down the information, click on “Apply system wide” and approve it by entering your password on the prompt that will come up.
Once you have done it, any software that use the network will automatically route through the proxy.